


I started with a piece of card stock 3"x 4" I put it into my paper trimmer and measured over 1/8" and drew a line with a pencil, and did this on all four sides.

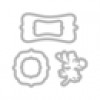
Then I chose a die, this one is a Sizzix/Hero Arts frame. I let the die hang off the edge of the card, and lined up my cutting plate to my pencil line. This way it doesn't cut off the whole die cut. Selective die cutting.

Here is what it looks like after the selective die cutting. The one end is still attached to the journal frame.

Next, get out a craft knife and a straight edge. Cut on the pencil lines, leaving the corners, and cutting around the die cut shape.

Take an eraser, and gently erase all the pencil lines. This one is now ready to use!

Here is what the one on the card looked like before. I attached it to a piece of patterned paper that I stamped on. This one also has a 'stitched' faux border that I made using a sewing tracing wheel. Works like a charm! I hope this tutorial helps if you decide on trying some out! Thank you for having a look!


3 comments:
Nice journal card to welcome the 1st day of Spring! Great tutorial, Pam and thank you for sharing! Enjoy!
A super tutorial Pam, its a beautiful journal card.
Yvonne x
Cool technique, Pam! I love how these look :)
Post a Comment