Pages

Thursday, December 8, 2011

Jolly Snowman

I haven't posted anything since Monday, so I thought I better get to it! I have been busying preparing for my workshop this week, and doing errands, putting up the tree, and the list goes on! This is another workshop card that I wanted to share, and is my favorite! I die cut the winter wonder die with chipboard and painted him white. Then with Weathered Wood, Black Soot, Ripe Persimmon, and Gathered Twigs DI, I shaded him a bit. Die cut 2 mini holly leaves and stuck it to his hat with some red rhinestones. I tied on some green twine for a scarf. I also die cut a mini flourish and glued it to the bottom of him. The sentiment and mini oval are from Stampin Up!, and the small scalloped oval from Marvy. Paper is from Authentique Wonder pad. I haven't had time to make any more Tim's 12 tags of Christmas, but maybe when I catch myself up I'll work on some! Thanks for stopping by!

Monday, December 5, 2011

My Christmas Card Workshop Peak!


This post is for the girls coming to my workshop this Saturday! This is only 4 of the cards, but you'll have to wait to see the rest! And looky there, even the inside of them are decorated! You didn't think I'd leave them blank did you! ;-)  The hobby lobby girls know that I am famous for leaving the inside of my cards blank. Once in a great while I get the urge to do the inside! But since this is a special workshop, I couldn't leave them blank! Hope you like them!

Tag Number 4 and Ornament from Tag 5


So, I'm a day late with Tim's tag #4, but I did finish it yesterday! My snowman's crackle affect is not that great, as I used a crackle medium, not the rock candy crackle. But there is some crackle in him none the less! My background came out pretty good, I used faded jeans distress stain, and white acrylic paint. The Unity snowflakes were stamped with weathered wood DI on the background. My clear snowflakes were cut out with a Spellbinders die, and let me tell you, I was disappointed that the dies will not cut all the way through the clear packaging. So I had to use my scissors to cut around them. And some buttons, sheer ribbon, and pearls to finish it off. Now my next project was fun, and amazing! I made an ornament with Tim's day 5 tag. I just happen to have bought some of the foil tape last week! I was amazed his technique worked! And what a pretty ornament it is! I used cranberry alcohol ink on mine, and an ippity dot background stamp. So cool! I don't have time right now to do the whole tag, as I have loads to do today, but maybe later I'll get to play some more!! Have fun!


Saturday, December 3, 2011

Tag Number 3!


Another improvised version of Tim's 12 Tags of Christmas, but I am quite pleased with my result! I do not have cut-n-dry foam, and have never tried his technique. But I have achieved a similar look with this technique. I used the post card texture fade folder, and embossed my tag in two different directions. That way the words fit on this smaller sized tag. Then with a very light hand, I used the distress tool and foam, and lightly went over the embossed words with various colors of DI. Makeup sponges work great for this also. The colors I used are Festive Berries, Evergreen Bough, Iced Spruce, Black Soot, and Wild Honey. Now, I did get a bit of ink on the non-embossed part of the tag, but once I sprayed it with Spun Sugar Smooch Spritz, it blended in! Very happy at this point! I then die cut my greenery items, and glued them in place, and added my already red rhinestones. Some sheer ribbon and twine, that I did curl up, and done! I did forget to put a bell on it, I do have some small ones. Having fun with these tags so far! Thank you for stopping by!.........................Pam

Friday, December 2, 2011

Tag Number 2!

Well, I'm on a roll! Got my 2nd Tim's 12 Tags of Christmas done! So here's how this one went, as I do not have anything he calls for! I started with plain kraft paper, stamped the music score with black stazon, stamped the words Joy, and embossed with clear. I painted my tag with watered down white acrylic paint. I stamped a Scrolls Works stamp with Evergreen Bough and Gathered Twigs DI, and added some berries with my fantastix and Festive berries DI. So far so good! My Spellbinders bird was cut out with chipboard, and white sticky back canvas that I colored with Antique Linen DI. Attached some twine around it's neck, a bead, and a chenille stem for the wreath. Not bad. The border at the bottom was punched out of kraft paper, and distressed with Gathered Twigs DI. My brads were distressed with a mini ball pien hammer. Colored my ribbon with Vintage Photo Distress Stain, and tied on green burlap. I am pleased with my interpretation of Tim's tag! Hope you are all having a good time with yours!!

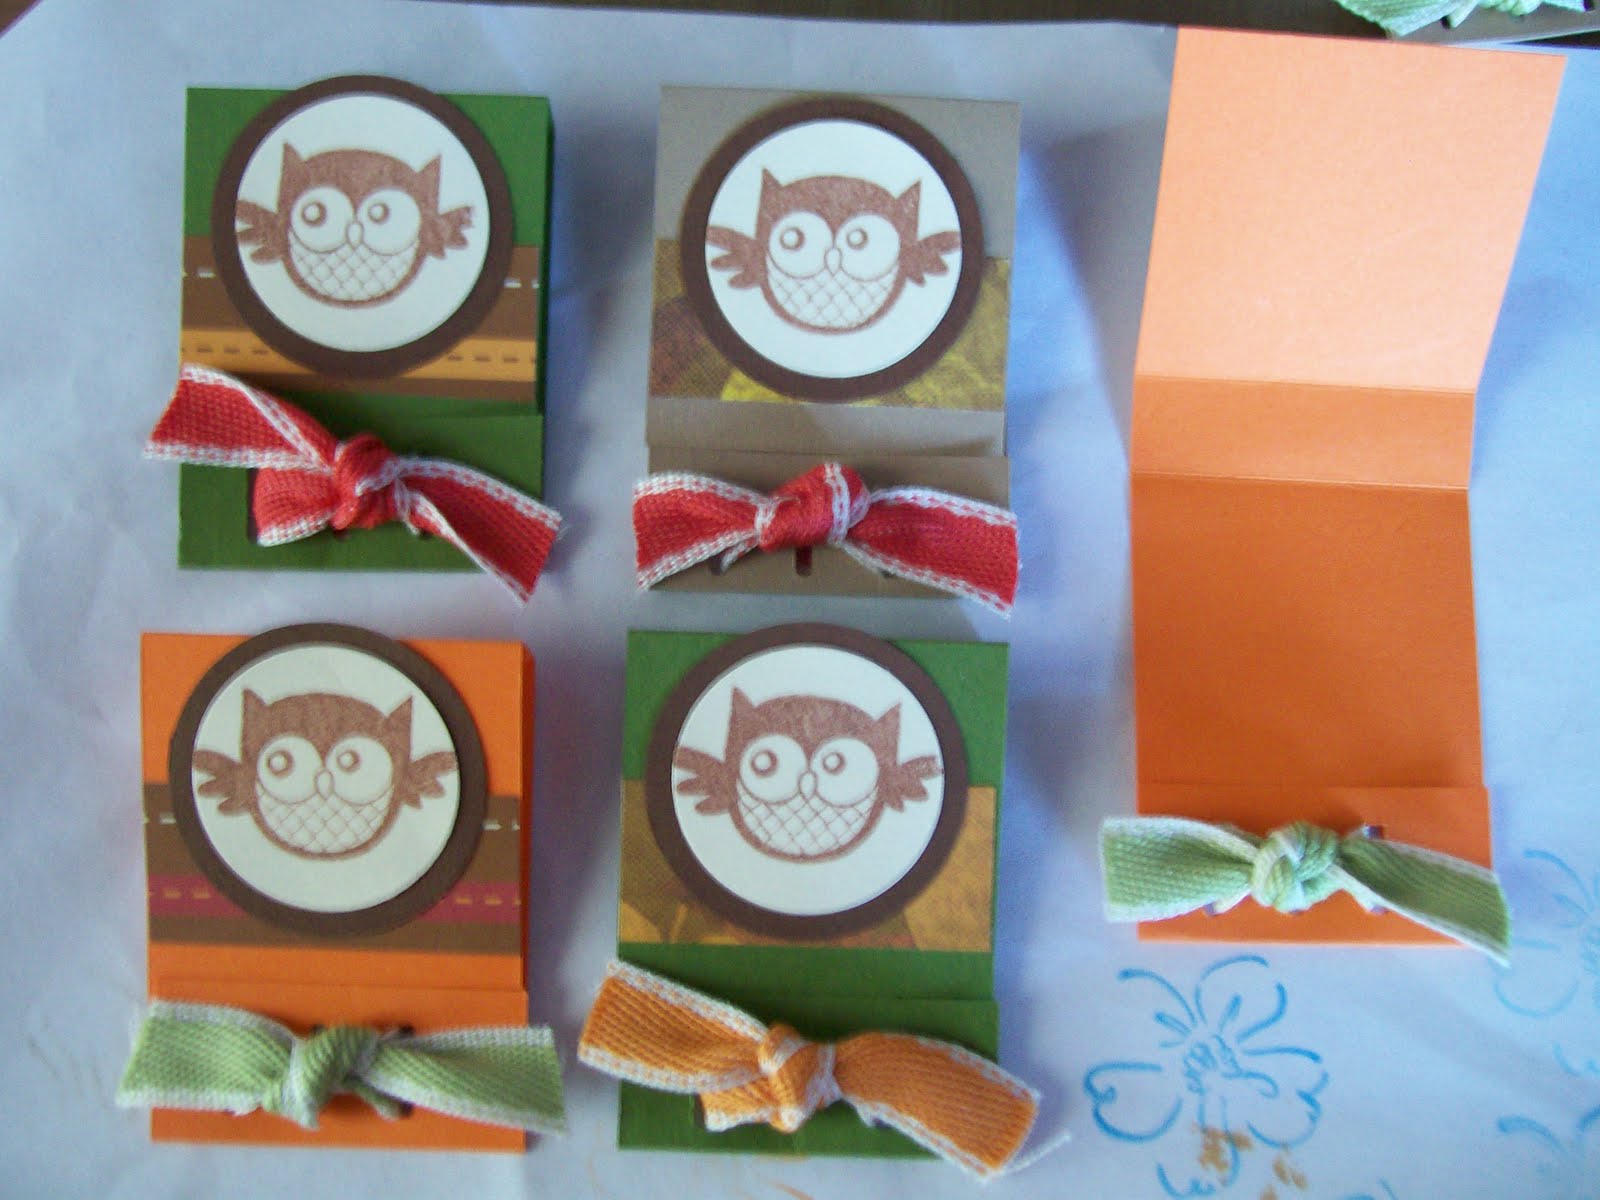
An Owl Flashback

This month at Flashback Friday Challenges, guest designer, Merry, has chosen to show your first owl project. These little matchbooks are my first owl projects posted from Sept. 2010. And also it was my 5th blog post. Don't think I had any followers yet, as I recieved no comments! But I did post the directions for making these, so if you'd like to read about, click here! I didn't get to play along last month at Flashback Friday, so I'm excited to have a project to show this time around! Thank you for taking the time to look in!

Thursday, December 1, 2011

My First 12 Tags of Christmas!

This is my second year following Tim's 12 Tags of Christmas, but my first tag I actually made! I've used the techniques he has shown in the past for other projects, but this year I wanted to actually join in, and makes some of his tags. And he also put a linky tool in his posts so you can link your tag to his blog. How cool is that?! My tag follows along pretty close. The EF is a Sizzix one by Basic Grey, sentiment was cut from my Cricut, I already had the pinecone die, and the mini holly leaf die. My pinecones turned out pretty good this time around, and look much better with a little paint and stickles on them. My paper is Coordinations and DCWV. Some beads from my stash, and true seam binding for the ribbon. I used the 2 new seasonal DI inks, Iced Spruce and Evergreen Bough. I had fun making this tag, although it took almost 2 hours! My husband asks me sometimes what I do all day, and if I get bored. He has no idea how long it takes to paper craft, and probably will never get it, but that's fine. I am more than happy to be in my craft room passing the hours by! It's a fantastic 'job' to have!!! Thank you for looking in!.......................................................Pam