Pages

Sunday, December 31, 2017

Snowman on Kraft


This is one of my newest snowman stamps. The artist is Tierra Jackson, and the stamp kit is called Wintertime Friends sold by Unity Stamp Co.

I heat embossed the images in white, and colored it in with Leisure Arts pencils that my son got me for Christmas. The white pencil didn't show up well, so I went over it with my Prismacolor one. I went over the eyes and mouth with an alcohol marker to turn them black.

I die cut the panel with a stitched square die from C.C. Designs, and the sentiment was punched out with a tag punch from Stampin' Up! A little lace and a rhinestone was the only accents I wanted.

I did stamp the card base with a larger snowflake from one of my Unity kit's of the month. Paper and inks are from Stampin' Up!, Crumb Cake, Bermuda Bay, and Daffodil Delight. White embossing powder from WOW!

I'm happy to be playing with my snowman stamps, but it's way to cold to go out and build one right now! I hope you all have a wonderful and Safe New Years!! And thank you all for your visits and comments throughout the year!

Tuesday, December 26, 2017

Salt Shaker Snowmen


This is what I've been up to in the last month. My crafting table was full of supplies for making these cute snowman gifts.

I bought the salt shakers in bulk, then started looking for all the things to make them with. The heads are dense styrofoam balls that I covered with snow texture paste and left to dry overnight. The noses I made with clay, and were baked in the oven. The eyes are rhinestones that I colored with an alcohol marker.

Their bodies are filled with floral sand, and the Girly ones have some added pearl beads. Everything was hot glued together, including the shaker tops as hats. I used chenille stems and rhinestone ribbon  around the hats, fabrics and ribbon for the scarves, and some have buttons down the fronts.

I think they look so cute all together, but they were made for gifts, and they were enjoyed. I did run out of the snow paste while making these, but I did make my own, and it worked quite well. I used the empty paste pot and added some Mod Podge and the floral sand I was using. I also added some micro fine glitter to the mix. After it dried, it looked very similar to the paste I bought, so I was pleased.

I hope you all had a wonderful Christmas! I am looking forward to my time off work until after the first of the year! I have my craft desk all cleaned up and ready for paper crafting. I am excited to get all my snowman stamps back out!

Thanks for your visit,

Monday, November 20, 2017

Paper Piecing


I made this a couple weeks ago for a paper piecing challenge on Facebook, and am just getting around to sharing here.

This image is from the October kit of the month from Unity. I paper pieced her coat, hat, and pants with some plaid papers, and colored the rest with alcohol markers. I added some white fun flock to her hat and mittens to make them look furry.

Some paper scraps were added to the background, and a few embellishments. I couldn't decide what sentiment to use, so I didn't use one at all. And yes, this is another 5x7 card :)

Thank you for your visit,

Sunday, November 5, 2017

Christmas Bear


It's been a few weeks that I have joined the challenge at Your Next Stamp, and am happy to play along again. I'm following the sketch and color combo with this one:


I've used the cute YNS stamp set called Huggles Christmas star. I stamped him onto Bristol 300 series paper with Black Olive ink, colored with Copic markers, and fussy cut them out. Following the sketch, I used a piece of plaid paper from the YNS For The Boys stack, and a small yellow plaid square from the YNS Hugs & Kisses stack. 

I glued all the layers down, and popped the bear up on foam tape, stamped the stars from this set, and stamped the sentiment also from the set and punched the end into a banner and popped it up as well. To finish it off, I added a few YNS matte gumdrops.

Another Christmas card done! This one is also 5x7, so far, every one I've made is this size. I wanted to make something different this year for my cards, and love the larger size! Thanks for visiting!


Sunday, October 29, 2017

Going in Circles


This journal page was inspired from the Try It On Tuesday challenge which is Circles. Some days I feel like I'm going in circles, a perfect theme page for my Personal Journal.

The cluster of circles is a stencil that I filled in with Distress Oxide inks. I then sponged around the rest of the page with Antique Lined DO, and spritzed water all about, then heat set. I doodled around some of the circles with a black and white pen. Then I noticed some of these circles look like planets, even if they are pink and purple :)

The stamping around the edge and sentiment come from the exclusive Jolande and Marleen kits from Unity, Go Forward and Keep Wild. I also added some white dots to these border images. I originally heat embossed the sentiment in clear, but after stamping the clock, I used the heat tool to dry it, and melted away most of the embossing. So I went over the sentiment with a black glaze pen, you would never know any different!

To contrast the circles, I added some straight lines by wrapping black thread around the page, and secured the intersections with colored pearls. The last touch was sponging the edges with Black Soot DO ink.

I like how it came out, and will be happy to add it in my journal. Thanks so much for your visit!


Friday, October 27, 2017

Christmas Tag Card


I have finally felt like getting in my craft room today, it has been a little while. Up and down emotions just haven't given me much ambition to craft. But I haven't given up, and am happy to be stamping!

The layout for this card came from Pinterest. A wonderful resource for ideas. I die cut the tags from patterned paper using a retired set, and used my punches for the holes in the top. I die cut one tag from vanilla card and stamped this cute birdie from the April 17' kit of the month set from Unity.

I used my alcohol markers to color him in, and stamped the sentiment from another Unity itty bitty set called Foxy Christmas. A very quick card to put together. I don't think I'm going to spend much time on Christmas cards this year. Quick and simple, but yet have an impact.

I shared this on the Unity Show & Tell Facebook group, and it has been well received. Thank you for that! I needed a lift me up.


Tuesday, October 17, 2017

Watercolor


A week or so ago, I wanted to do some watercoloring, so I stamped this leaf from Unity all around this panel and just had a play. Not long ago I bought a set of Gambsai watercolor paints, and I really like them. Easy to use, and if you don't like what you see, you can dab a paper towel over it and most of the color comes off to start over.

I first started to color the leaves all one color, but then decided to add in more. I like this look more. The red and brown leaves don't show much difference on camera, but they both have yellow and orange in them.

The heart centers are colored pink, and once dry, I went over them with Wink of Stella for a bit of shimmer. The sentiment is from a Unity Itty Bitty and added some linen twine and a wood heart for some Fall texture. I also added some more splats to the background with my watered-down paint brush and brown paint.

Thank you for your visit, and I'm hoping to get to post more soon!


Saturday, September 30, 2017

Happy Tree


I just love this tree stamp! This is in the Unity September kit of the month, and it's one of the larger stamps in the kit. This card is a 5x7. Which I don't make often, but sometimes you just have to! :)

I made this card following a Facebook sketch challenge, which is now over. Even though this image came out with other Autumn stamps and sentiments, it can be used year 'round depending on how you color it. I think it's just darling, with it's simplistic style and those sweet stars hanging from it's limb.

This is stamped onto watercolor paper, colored with markers, then a wet brush to blend the colors out. I went with a yellow outline to make it look like the sun setting behind it. The papers in the background I bought last year, and is in my 'fall colors' stash. I had to add some rustic twine for texture, and a few enamel dots to finish. The spots in the background were made by tapping my paint brush when it had brown ink on it.

Now I need to make or buy some 5x7 envelopes so I can get to mailing this!! Thank you for having a look!

Messy Watercolor


I haven't been posting much as of late, so I thought I should do some catching up on some of the art I've been making. My job has kept me busy this month, working nights, overnights, and back to mornings then nights again. There has been so much to do, and we still have some catching up to do. Many changes have been going on, and now my home life may be taking a huge change. Now, I like changes, change is a good thing. But it's those abrupt changes that throw me off, and it takes me awhile to adjust. I will get there eventually, just have to keep my head high!

Anyway, this 8x6 page was made for fun. Just playing with my watercolor paints one day. This large leaf/feather image is from Unity, and I began this page by stamping it with a blackberry color ink. Then I just painted on some watercolors in various colors all around. I spritzed the stamped image with water, and well....it just spread out leaving hardly any image remaining.

So, I stared at it for awhile, and decided to stamp the image again on top of the mess, and heat emboss in white. I didn't use a stamp positioner, just a very large block, so it didn't quite line up perfectly. But after I heat embossed it, it created a bit of a shadow, and I thought that was a very happy accident!

Then I added some washi tape to the one corner, stamped around the edge, and then stamped a matching sentiment, both from Unity. Another page done to add into my journal!

Thanks so much for your visit!

Sunday, September 17, 2017

Pumpkin Kitty


I'm playing with the Your Next Stamp Box Full of Cuteness stamp set again! I've followed the sketch for the YNS challenge #73:


There are so many uses for this cute stamp set, because each image only has it's head and feet, so you can make them pop out of anything. I knew the kitty would be perfect for a Halloween card, so I made a pumpkin with a circle and oval punch. The kitty is colored with Tombow markers onto watercolor paper, and fussy cut out.

I die cut an oval from a retired C.C. Designs set, sponged on some oxide ink, and die cut the grass border from YNS. I glued the grass across the oval, then hand cut off the rest. I chose some Fall themed paper, and went with a darker yellow card base.

I don't have any YNS sentiment stamps that would go with this, so I used the YNS hello die. I die cut it four times, glued them all together, then clear embossed it all with two layers. After I assembled the card, I added some YNS gumdrop enamel shapes.

I think it's really cute, and perfect for the Fall season. Thanks so much for your visit!

Saturday, September 16, 2017

Laugh Out Loud


Isn't that sentiment cute?! I made this card following the 'Animals' theme for the monthly Paper Smooches challenge:


I watched a video from Jennifer McGuire where she stamped on acetate and used it as a window on a card. I thought it was fun, and something different to do. My acetate window isn't stamped though, they are positive and negative die cuts from the PS Birch Trees die, and I glued them on top. The stitched frame dies are retired from C.C. Designs. This was the easy part...


The cute animals are from the PS Party Posse stamp set. My original plan was to color them with alcohol markers. Well, it wasn't a good coloring day for me, so I decided to go with my tombow markers. I made the mistake of not stamping onto watercolor paper, so that was a failure too. Oh, and in between all that I was trying to mirror stamp the dino so they would be facing each other.

So after an hour of messing with that, I decided to just stamp onto some cute papers, emboss them, and no mirror stamping. So I stamped and fussy cut, and paper pieced the turtle. Since I didn't have a mirrored image, I played around with how they were going to sit in that window area. Stacked up was it, and I think they look so cute that way :)

Then it was time to look for a sentiment, and this one from the PS Group Hugs was perfect! Now it was time for assembly. I chose the blue paper for behind the trees, and glued it to the acetate piece. It looked very cold and winter-like, so to warm it up, I chose a soft yellow card base. I glued down the window layer.....upside down!!!! So I had to cut it off and make another card base.

And finally I had the card done! It didn't go smoothly at all, but I was determined to finish it!! And I am very pleased with the end result. So all the frustration was worth it :) Thanks so much for your visit!

Sunday, September 10, 2017

Sweet Hello


I made this card following the sketch for the Your Next Stamp challenge:


This cute Girl is from the YNS stamp set called Ellie Loves Lattes. I used YNS Black Olive ink and stamped her onto Bristol 300 paper and colored her with Copic markers from the Floral Favorites set. I stamped the to go cup all over the card base, and layered on top a piece of patterned paper from the YNS Crazy for Coffee paper pad. The sentiment is stamped with Vintage Photo Distress Oxide ink and punched out. I popped that up on foam squares and added some matte YNS gumdrops at the bottom.

I won all these products from the YNS blog hop when they were sponsoring the Coffee Lovers Blog Hop. I love all these! And I can't go without my coffee in the morning! :)


Tuesday, September 5, 2017

30 Day Coloring Challenge


I have seen many people join the 30 day coloring challenge at The Daily Marker, but this is my first time joining in. 


For my first entry, I have used this cute image from C.C. Designs called Autumn's Mum. She is stamped onto Canson XL watercolor paper using My Favorite Things black hybrid ink. I wanted to use my Tombow markers, and I am still learning the shading and blending with them. I don't have any dark blue, so I used Faded Jeans Distress marker on her pants. They react very similarly to the Tombow's.

I had a little trouble getting her hair just right, but I'll keep practicing! Once I dried her, I fussy cut her out. I kept the card very simple with few embellishments. I did break out my Cuttlebug stitching border embossing folder. I haven't used them for years! There is buttons, dots, florals and vines that came in this set, and I need to use them more often ;)

The sentiment is from the C.C. Designs Happy Sentiments set, and put it at the top to take up some blank space.

Thanks for visiting, and I will try to add some more images for this challenge!

Thursday, August 31, 2017

Full of Blessings


This card was inspired by the Unity Stamp Co.'s Facebook challenge. The mood board is full of tans and creams, twine and other rustic elements.

I chose this sweet Girl image from the Phyllis Harris kit.....a beauty all it's own. I think she looks a bit vintage, and would fit the theme perfectly. She is colored with distress markers and inks.

This card measures 5x7, and I stamped the background with an image from the Donna Downey kit, Imagine It. I added lots of layers of various items, and offset the Girl to one side. The sentiment is from the August 17' kit of the month, and I think goes well with this card.

Thanks for having a look!

Wednesday, August 23, 2017

Thankful Autumn


I'm joining in the monthly Joy Clair challenge following the DT's theme of layers and following the colors offered:

Agosto Challenge - Layers

I did a similar layout that was in my last post, I still love the way it looks, and it's getting me to use up those ribbons that I've had for a long time.

I stamped the pumpkins from the Joy Clair set, Trick or Treat, onto patterned paper and added some shading with alcohol markers. The sentiment is from the Hugs & Smiles set and I masked part of it off. It actually reads 'thankful for your', so I taped off the your, stamped it, then used another sentiment in that set that had 'you' in it, masked it off then stamped it as well. Great way to get the most out of your sentiments for sure!

The die cut circle was sponged with Distress Oxide, then splashed with water and dried. This is the first Autumn card I've made for the upcoming season. I just love pumpkins! Thanks so much for visiting! 

Saturday, August 19, 2017

Sweet Kitty


I'm playing along with the Your Next Stamp challenge, using the colors this time.


I've used the YNS Box Full of Cuteness stamp set again, this time using the sweet kitty image. I propped her up onto the YNS circle and scallop dies. She is colored with Spectrum markers. The card base is stamped with the YNS Mini Hearts Ink Splatter, and then I layered various ribbons and a paper strip. I got this layout idea from Pinterest.

The sentiment is from the YNS Tobi's Bear Hugs set, and I cut it into a banner, then added some enameled dots around the card. I like how this looks, with all the different textures and colors.

Thank you for having a look!

Birthday Pup


Sharing a card made for the CAS on Friday challenge, which has a Birthday theme this time around.

The cute pup is from the Love & Smiles set, and the rainbow from the Rainbows and Happiness set from Your Next Stamp. I did the no line coloring technique, and colored with Spectrum markers. The heart balloons came out too dark, so I stamped onto printed vellum and fussy cut them out, and glued them on top. I wanted to try and keep a pastel theme going.

I added some washi tape for the grass, and used the YNS set Smiley Happy Critter Crew Three for the sentiment. The panel was die cut  with a C.C. Designs die, and clouds are from a Memory Box die.

Thanks for visiting!

Sunday, August 13, 2017

Bear in a Box


I'm playing along with the Your Next Stamp challenge following their sketch:


I've used the YNS stamp set called Box Full of Cuteness, and it really is cute! I've used the bear in the box and colored it with my Tombow markers, and fussy cut him out, then popped him up into the box.

The papers are from the YNS For the Boys paper pad, and I added some of their enamel gumdrops as well. I have some other ideas for this set, without using the box. Now to just find some more time to play.

Thank you you for visiting!


Thursday, August 10, 2017

Neutrals Journal Page


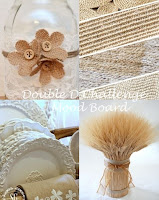
Today's journal page was inspired by the Double D challenge this time, which is Neutrals with Texture:


Lots of layers were added to this page, crumpled paper, embossed paper, punched flowers, die cut butterflies, ribbon, raffia, buttons, and a mini paper clip. The butterflies are a Stampin' Up! framelit die, and I used vanilla card stock on them, and chose to sponge just one.

The sentiment/quote is from the Unity August kit of the month, and was die cut with a retired C.C. Designs die. I like how this turned out, and another page done in my personal journal(which is an old microwave cookbook).

Thank you so much for having a look!